
In This Article
Establishing an Ethereum wallet is the initial step for anyone looking to securely handle their Ethereum or Ethereum-related digital assets.
To create an Ethereum wallet, you begin by selecting a reliable wallet application or software that meets your security requirements and is compatible with your device. This could be a hot wallet such as MetaMask, which provides convenient access and interaction with blockchain exchanges and applications, or a more secure alternative like a hardware wallet.
Numerous wallet applications enable you to set up an account across various devices, including smartphones and laptops. Users can easily follow straightforward steps such as downloading the application, establishing a new account, and protecting it with a recovery phrase. Crypto expert Vitalik Buterin emphasizes the necessity of safeguarding your recovery phrase, as it serves as the key to regain access to your assets if required.
On Twitter, cryptocurrency enthusiasts frequently engage in discussions about the best methods for setting up and managing Ethereum wallets. Industry experts often mention that widely-used wallets are user-friendly and accessible, making it easy for newcomers to learn how to manage their cryptocurrencies. Participating in these conversations can provide you with valuable insights and strategies to enhance your wallet experience.
Ethereum Wallets

Ethereum wallets are used for managing digital assets and interacting with the Ethereum blockchain. They offer different options like hardware and software wallets for different security needs and preferences.
Types of Ethereum Wallets
Ethereum wallets come in many types, each for different security and accessibility needs.
Hardware wallets are physical devices that keep private keys offline, more secure from hacks. Favored by those who hold large amounts of cryptocurrency. Examples are Ledger and Trezor.
Software wallets are for accessibility, existing as apps or extensions. Less secure than hardware wallets but provides easy access to funds. Popular options are MetaMask and Trust Wallet.
Paper wallets are the middle ground, storing keys on a printed sheet. Although secure from cyber threats, they can be lost or damaged, a risk.
Choosing the right one is about balancing convenience and security.
What makes a good Ethereum wallet
A good Ethereum wallet prioritizes security and user friendly. It has two-factor authentication (2FA), an extra layer of security. Only authorized users can access it.
Backup and recovery options are also important. Using a recovery phrase allows you to regain access if you lose your device. Keeping this phrase offline will further secure your assets.
Updates from wallet providers mean active maintenance, and fixing potential vulnerabilities. Independent security audits can give you peace of mind.
Experts advise against wallets that don’t have these features. Privacy and security without sacrificing usability are good for long term management of crypto assets.
How to Create an Ethereum Wallet

Using MetaMask
Creating an Ethereum wallet with MetaMask is a straightforward process that allows you to manage your Ethereum-based assets and interact with decentralized applications.
To begin, visit the official MetaMask website or your device's app store to download the MetaMask extension or mobile app.
Ensure you are downloading it from the official source to maintain security. Once installed, open MetaMask and click "Get Started" to proceed.
The next step involves creating a new wallet. Click the option to "Create a Wallet" and review the terms and conditions presented by MetaMask. After agreeing to the terms, you’ll be prompted to set up a password. Choose a strong and unique password, as this will be used to access your wallet. Note that this password only secures the wallet on your specific device.
After setting your password, MetaMask will generate a Secret Recovery Phrase, also known as a seed phrase. This is a critical step, as the recovery phrase is the key to accessing your wallet if you lose access to your device. Write down the recovery phrase on paper or store it in a secure offline location. Avoid saving it digitally to minimize the risk of hacking. Once you’ve saved the phrase, MetaMask will ask you to confirm it by selecting the words in the correct order. This ensures you have properly backed it up.
Once the recovery phrase is confirmed, your wallet is ready to use. You can view your Ethereum address by clicking on the account name, which you can use to receive funds or connect to decentralized applications. To start interacting with the Ethereum blockchain, you’ll need to fund your wallet by sending Ethereum from an exchange or another wallet to your MetaMask address. You can also add other Ethereum-based tokens to your wallet by clicking "Import Tokens" and entering the contract details of the token.
By following these steps, you’ll have successfully set up your MetaMask Ethereum wallet. It’s important to keep your recovery phrase secure and never share it with anyone. With MetaMask, you can explore the decentralized web, manage your Ethereum assets, and participate in the growing world of blockchain technology.
You might need to add the Etthereum network to MetaMask if it it not already added. To do so, you can follow the steps in this video:
Using a Hardware Wallet
Setting up a hardware crypto wallet is an essential step in securing your digital assets. Hardware wallets, such as Trezor and Ledger, provide offline storage for your cryptocurrencies, protecting them from online threats like hacking or phishing attacks. The setup process is straightforward but requires careful attention to detail to ensure maximum security for your funds.
To begin, purchase your hardware wallet directly from the manufacturer or an authorized reseller to avoid counterfeit products. Once you receive your device, inspect it for tampering and follow the manufacturer’s instructions to initialize it. Connect the wallet to your computer or mobile device using the provided cable, or pair it via Bluetooth for models that support wireless connectivity. You’ll be prompted to install the corresponding companion app, such as Trezor Suite for Trezor or Ledger Live for Ledger. These apps are essential for managing your wallet and interacting with your crypto assets.
After installing the app, follow the on-screen instructions to create a new wallet. This process involves setting up a PIN code to secure access to the device. Choose a strong PIN and ensure you remember it, as losing it could lock you out of your wallet. Once the PIN is set, the wallet will generate a recovery phrase, also known as a seed phrase. This phrase is a sequence of 12, 18, or 24 words, and it acts as the backup key to your wallet. Write down the recovery phrase on paper and store it in a secure, offline location. Never share this phrase with anyone or store it digitally, as it is the only way to recover your wallet if the device is lost or damaged.
Once you’ve backed up your recovery phrase, the wallet setup is complete. You can now transfer funds to your hardware wallet by sending them to the public address displayed in your companion app. To manage additional cryptocurrencies or tokens, you may need to install specific apps on the hardware wallet through the companion software. For example, Ledger devices require individual apps for managing different blockchain networks, which can be easily added via Ledger Live.
Finally, test the wallet by sending a small amount of cryptocurrency to ensure everything is working correctly. Familiarize yourself with the wallet’s features and security measures, such as confirming transactions on the device itself. By completing these steps, you’ll have successfully set up a hardware wallet, providing your cryptocurrencies with an extra layer of protection against cyber threats. Always keep your recovery phrase safe and avoid sharing your device or PIN with anyone to maintain the highest level of security.
Trezor vs Ledger
Trezor and Ledger are two of the most well-known and trusted hardware wallet brands in the cryptocurrency space. Both offer robust security solutions for storing digital assets offline, but they cater to slightly different user preferences and use cases. Choosing between them often comes down to personal priorities, such as ease of use, compatibility, and design.
Trezor wallets, developed by SatoshiLabs, were among the first hardware wallets on the market. Known for their open-source software, Trezor devices emphasize transparency and community-driven improvements. The flagship models, Trezor One and Trezor Model T, support a wide range of cryptocurrencies, making them appealing to users with diverse portfolios.
The Trezor Model T, in particular, features a color touchscreen for enhanced usability and offers compatibility with third-party wallets like MetaMask. One of Trezor’s key advantages is its user-friendly setup process, which is designed to make onboarding easy for beginners. However, some users may see its fully open-source nature as a double-edged sword, as it could potentially expose vulnerabilities if not managed carefully.
Ledger wallets, produced by Ledger SAS, are also highly respected for their security features and sleek design. The Ledger Nano S Plus and Ledger Nano X are the company’s most popular models, with the Nano X offering Bluetooth connectivity for greater convenience when managing assets on the go.
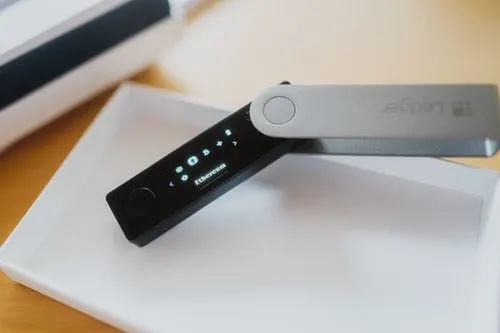
Ledger devices use a proprietary operating system, which enhances security by isolating applications and transactions, though this closed-source approach has drawn criticism from open-source advocates. Ledger wallets are compatible with Ledger Live, an intuitive app for managing assets and staking directly from the wallet. With extensive cryptocurrency support and a more compact design compared to Trezor, Ledger appeals to users looking for portability and a more polished interface.
When it comes to security, both wallets employ PIN protection, recovery seed phrases, and firmware updates to safeguard funds. However, Ledger’s dual-chip architecture and secure element (used in the Nano models) provide an extra layer of hardware-based protection, often touted as a selling point over Trezor’s single-chip design. On the other hand, Trezor’s fully open-source firmware allows for greater transparency and the ability to audit the code, which is valued by security-conscious users.
In summary, Trezor and Ledger both offer excellent hardware wallet solutions, but they differ in design, approach to security, and user experience. Trezor may be a better fit for users who prioritize open-source transparency and touchscreen functionality, while Ledger is ideal for those seeking advanced hardware security features and a compact, modern design. Regardless of which wallet you choose, both provide a highly secure way to store and manage cryptocurrency, giving users peace of mind in an increasingly digital financial world.
Secure your Ethereum wallet
Securing your Ethereum wallet is important for your digital assets. Here are the key steps: creating a strong password, backing up the wallet, and enabling 2fa.
Strong Password
For maximum security, a strong password is required. It should be at least 12 characters long and should have letters, numbers, and symbols. Avoid using easily guessed words or sequences like "123456".
Using a passphrase made of random words is another way to increase security. Password managers can store complex passwords securely and generate unique passwords for multiple accounts.
Update your password regularly. If you sense a breach, change your password immediately. This will strengthen your wallet’s defenses against threats.
Back up your wallet
Backing up your wallet is important to not lose access to your Ethereum assets.
Most wallets provide a seed phrase, a sequence of words to recover your wallet. Write it down and keep it safe offline.
Store the seed phrase in a safe or lockbox and never share it with anyone.
Beyond seed phrases, some users use hardware wallets for extra security as these devices has encryption and physical safety.
Check your backup solutions regularly to make sure they are up-to-date and accessible. Some users have multiple backup copies to ensure redundancy in case of loss or damage. Being proactive with backup is key to securing your digital assets.
2fa
Two-factor authentication (2fa) adds an extra layer of security to your wallet. It requires a second form of verification, like a code sent to your mobile device, along with your password. This will prevent unauthorized access even if your password is compromised.
You can enable 2fa in your wallet settings. Besides SMS codes, authentication apps like Google Authenticator are more secure.
Every time you access the wallet you need to provide both the password and the authentication code.
2fa is a recommended best practice in the crypto community. As said by cybersecurity experts this will add an extra layer of security by creating an additional barrier for hackers.
Receive and Send Ethereum

Interacting with Ethereum involves two main actions: receive and send. Understanding these will make transactions smooth and secure.
Receive Ethereum
To receive Ethereum you need an Ethereum wallet. This wallet will generate a unique address that others will use to send Ethereum to you. The address is a long string of letters and numbers. You can share this address with others who want to send Ethereum to you.
When setting up a wallet make sure it’s connected to the Ethereum network. Many wallets allow you to create a QR code linked to your wallet address for easier sharing. Scanning a QR code instead of typing the address will reduce errors.
Besides the technicalities, crypto Twitter enthusiasts stress to double check the wallet address before receiving any funds. Mable Jiang, a crypto analyst, says “Verification is key in crypto transactions to avoid missed transfers”. This is a reminder to be extra careful every time you receive Ethereum.
Send Ethereum
Sending Ethereum requires the same level of care.
First, you need the recipient’s Ethereum wallet address. Make sure this is correct. Mismatches will result in failed transactions or lost Ethereum.
Once the address is confirmed, the sender should input this address in their wallet app. Most wallets have a “Send” button or similar. Confirm the transaction details, and amount of Ethereum to be sent.
Sending Ethereum is easy but crypto experts like Alex Gladstein advise users to check transaction fees and network congestion. This will help you manage costs and confirm timely transfers.
Wallet Safety
Keeping your Ethereum wallet safe means updating software regularly and monitoring wallet activities closely. This will prevent unauthorized access and keep your funds safe from threats.
Software Updates
Keep your software up to date.
Software updates usually include security patches for new threats. Not updating will leave you vulnerable to hackers.
Most wallets will notify you of available updates so don’t ignore them.
Only download from official sources to avoid malware.
Wallet providers like MetaMask release updates to increase security and functionality. Always enable notifications and apply them as soon as possible.
Monitor Wallet Activities
Monitoring transactions and activities in your wallet is important to detect unusual behavior. Unexpected transactions mean unauthorized access. Setting up notifications for each transaction will help you detect unauthorized activities fast.
Many wallet providers allow you to review transaction history so you can spot irregularities. Make sure your private keys are confidential, these are the ones that authorize transactions. Monitoring tools and alerts will be your best friend in a secure wallet environment.
